by Caleb Feb 07,2025
Conquer Baramos's Lair in Dragon Quest 3 Remake: A Comprehensive Guide
After securing the Six Orbs and hatching Ramia the Everbird, you're ready to challenge Baramos's Lair in Dragon Quest 3 Remake. This dungeon serves as a crucial test before venturing into the underworld. This guide details navigating and conquering Baramos's Lair.
Baramos's Lair houses the Archfiend Baramos, the primary antagonist of the game's first half. Access is granted only after obtaining Ramia. Aim for a Hero level of at least 20 before attempting this challenge. The dungeon holds valuable items, detailed in the following sections.
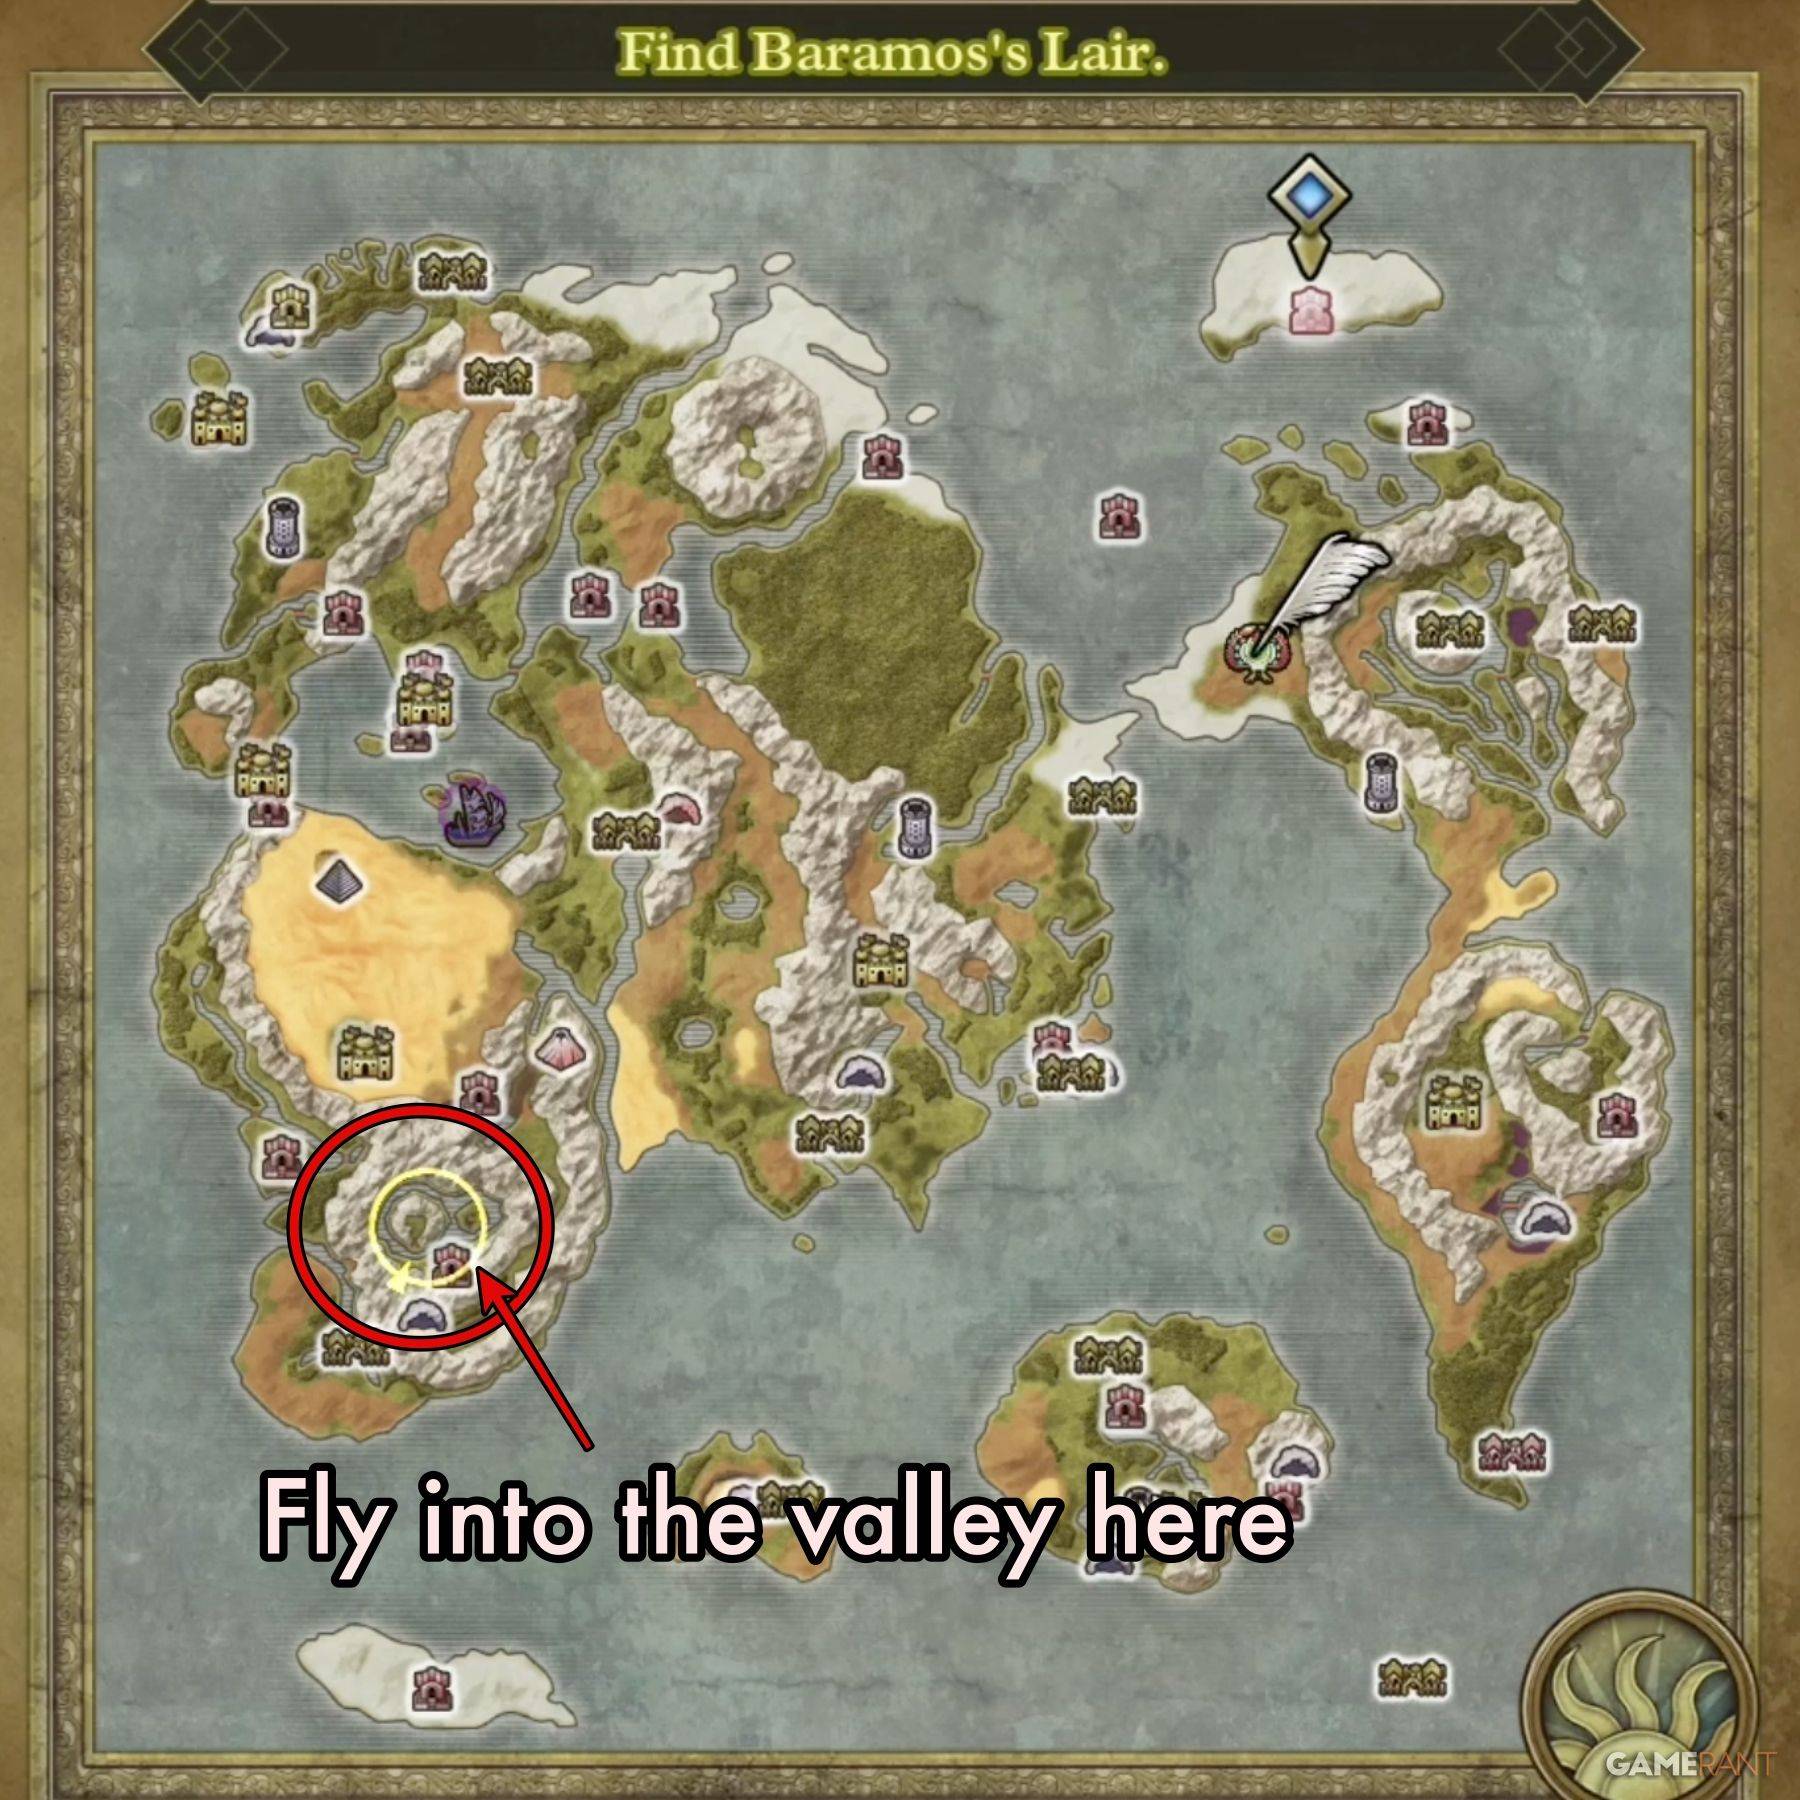
Following the Maw of the Necrogond and acquiring the Silver Orb unlocks the Everbird. Fly Ramia from either the Shrine of the Everbird or Necrogond Shrine to the island north of Necrogond, nestled amidst mountains. This island marks Baramos's Lair's entrance.
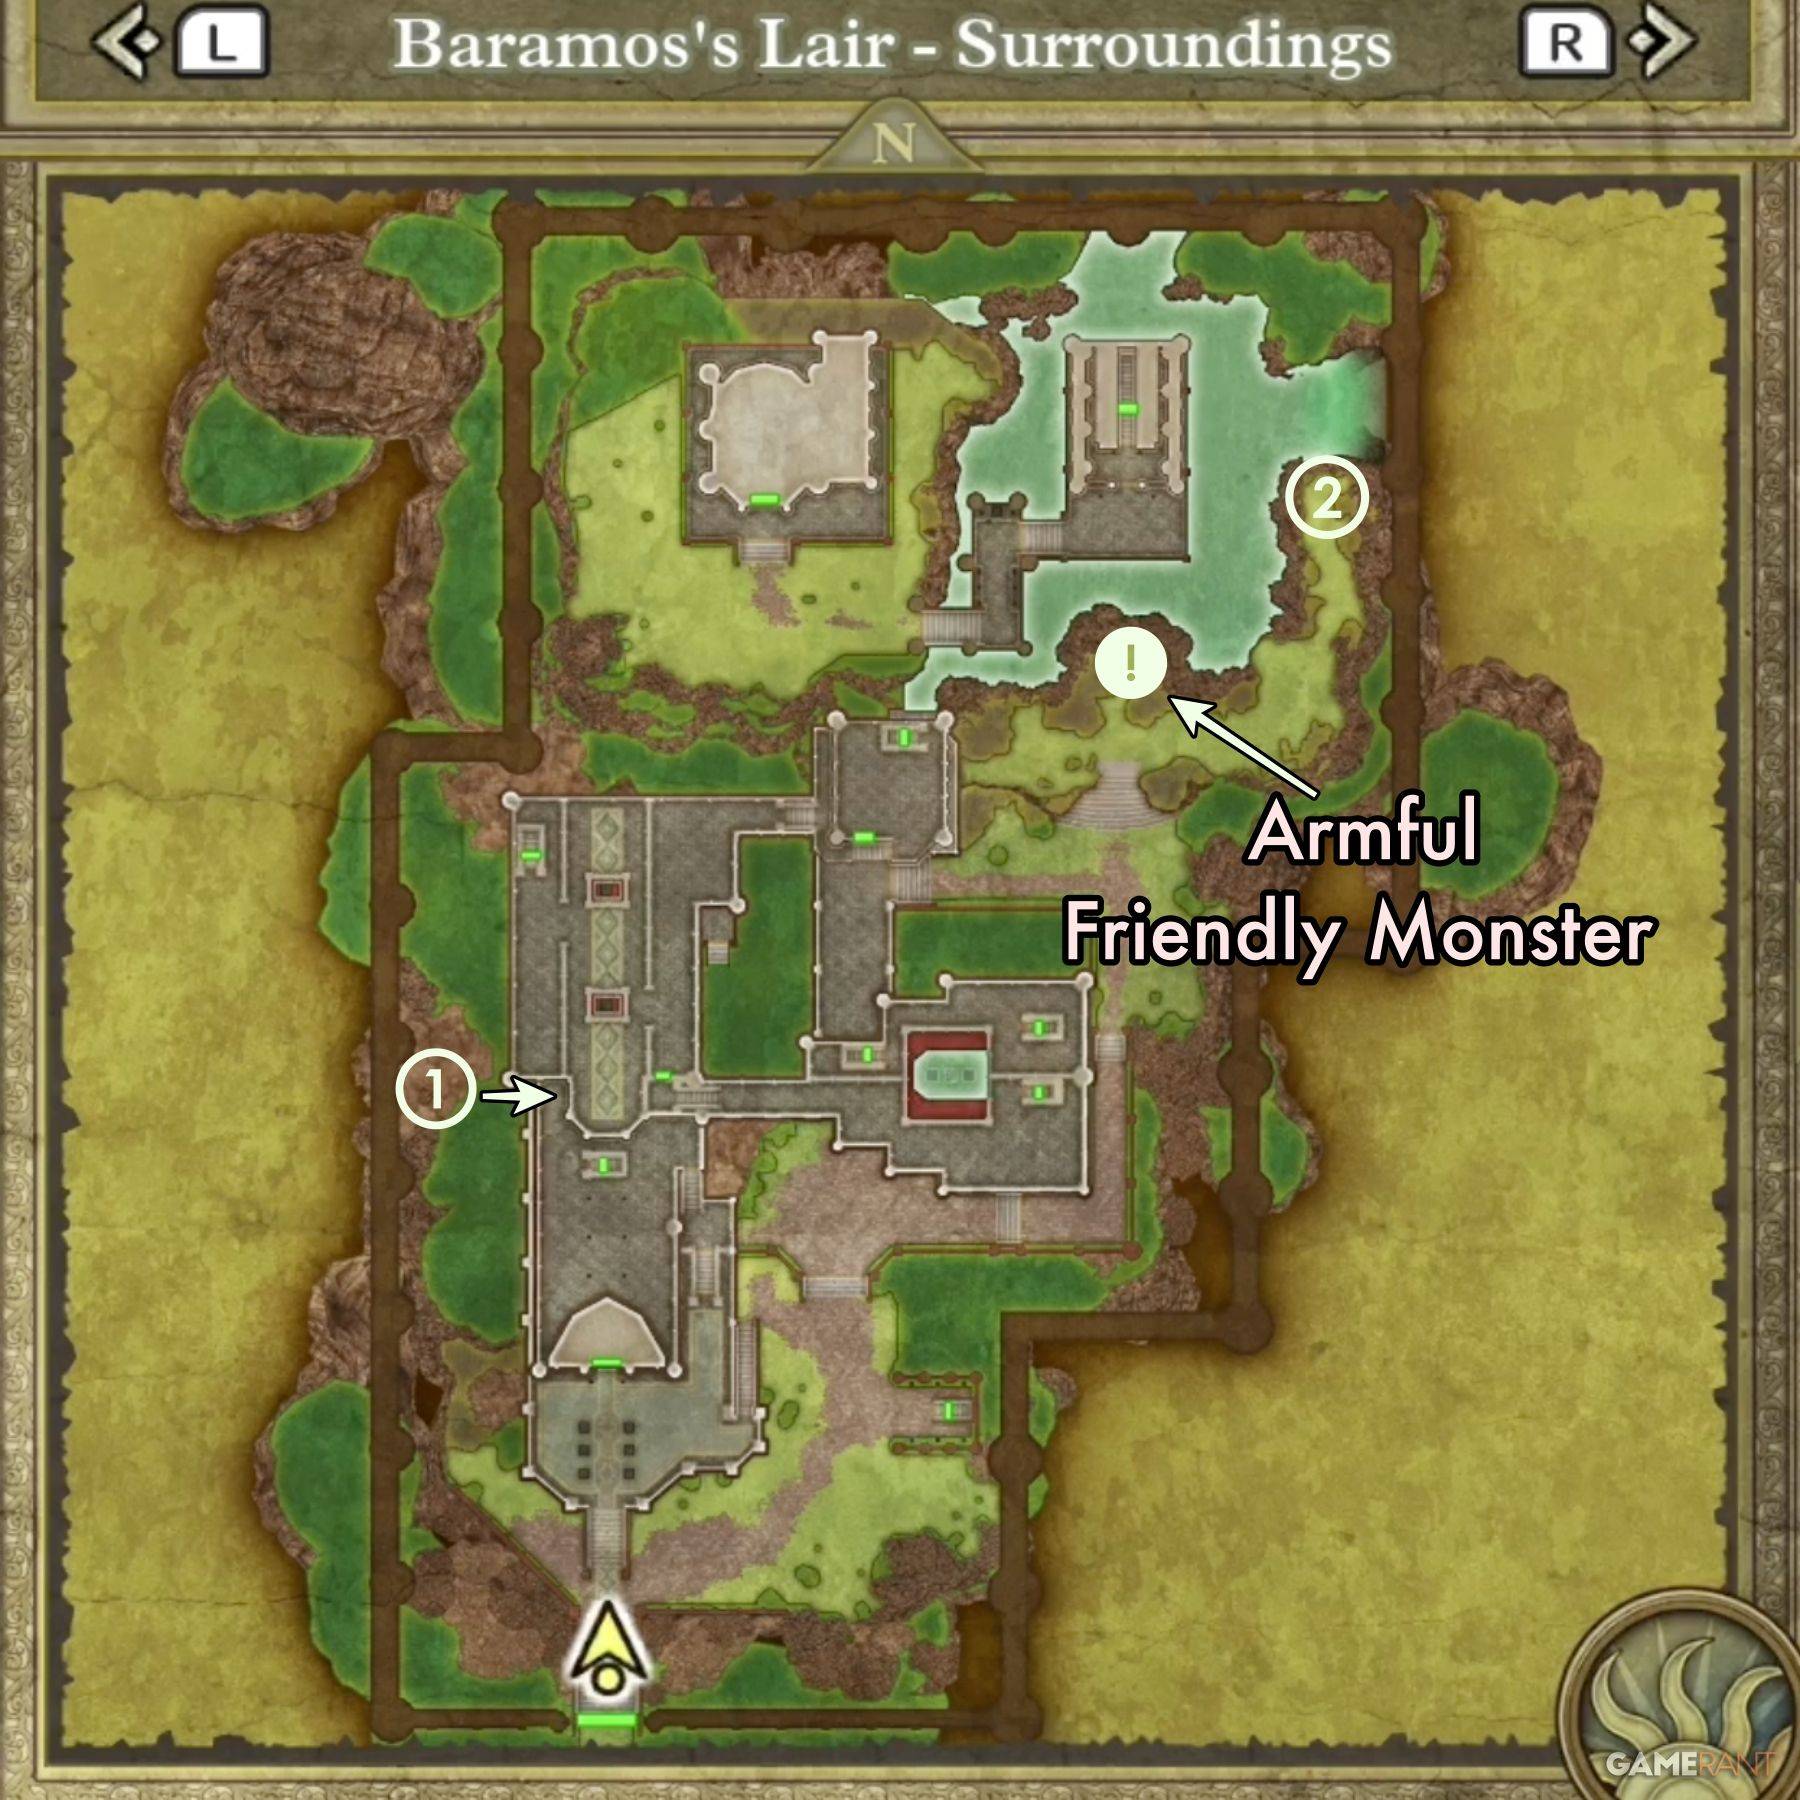
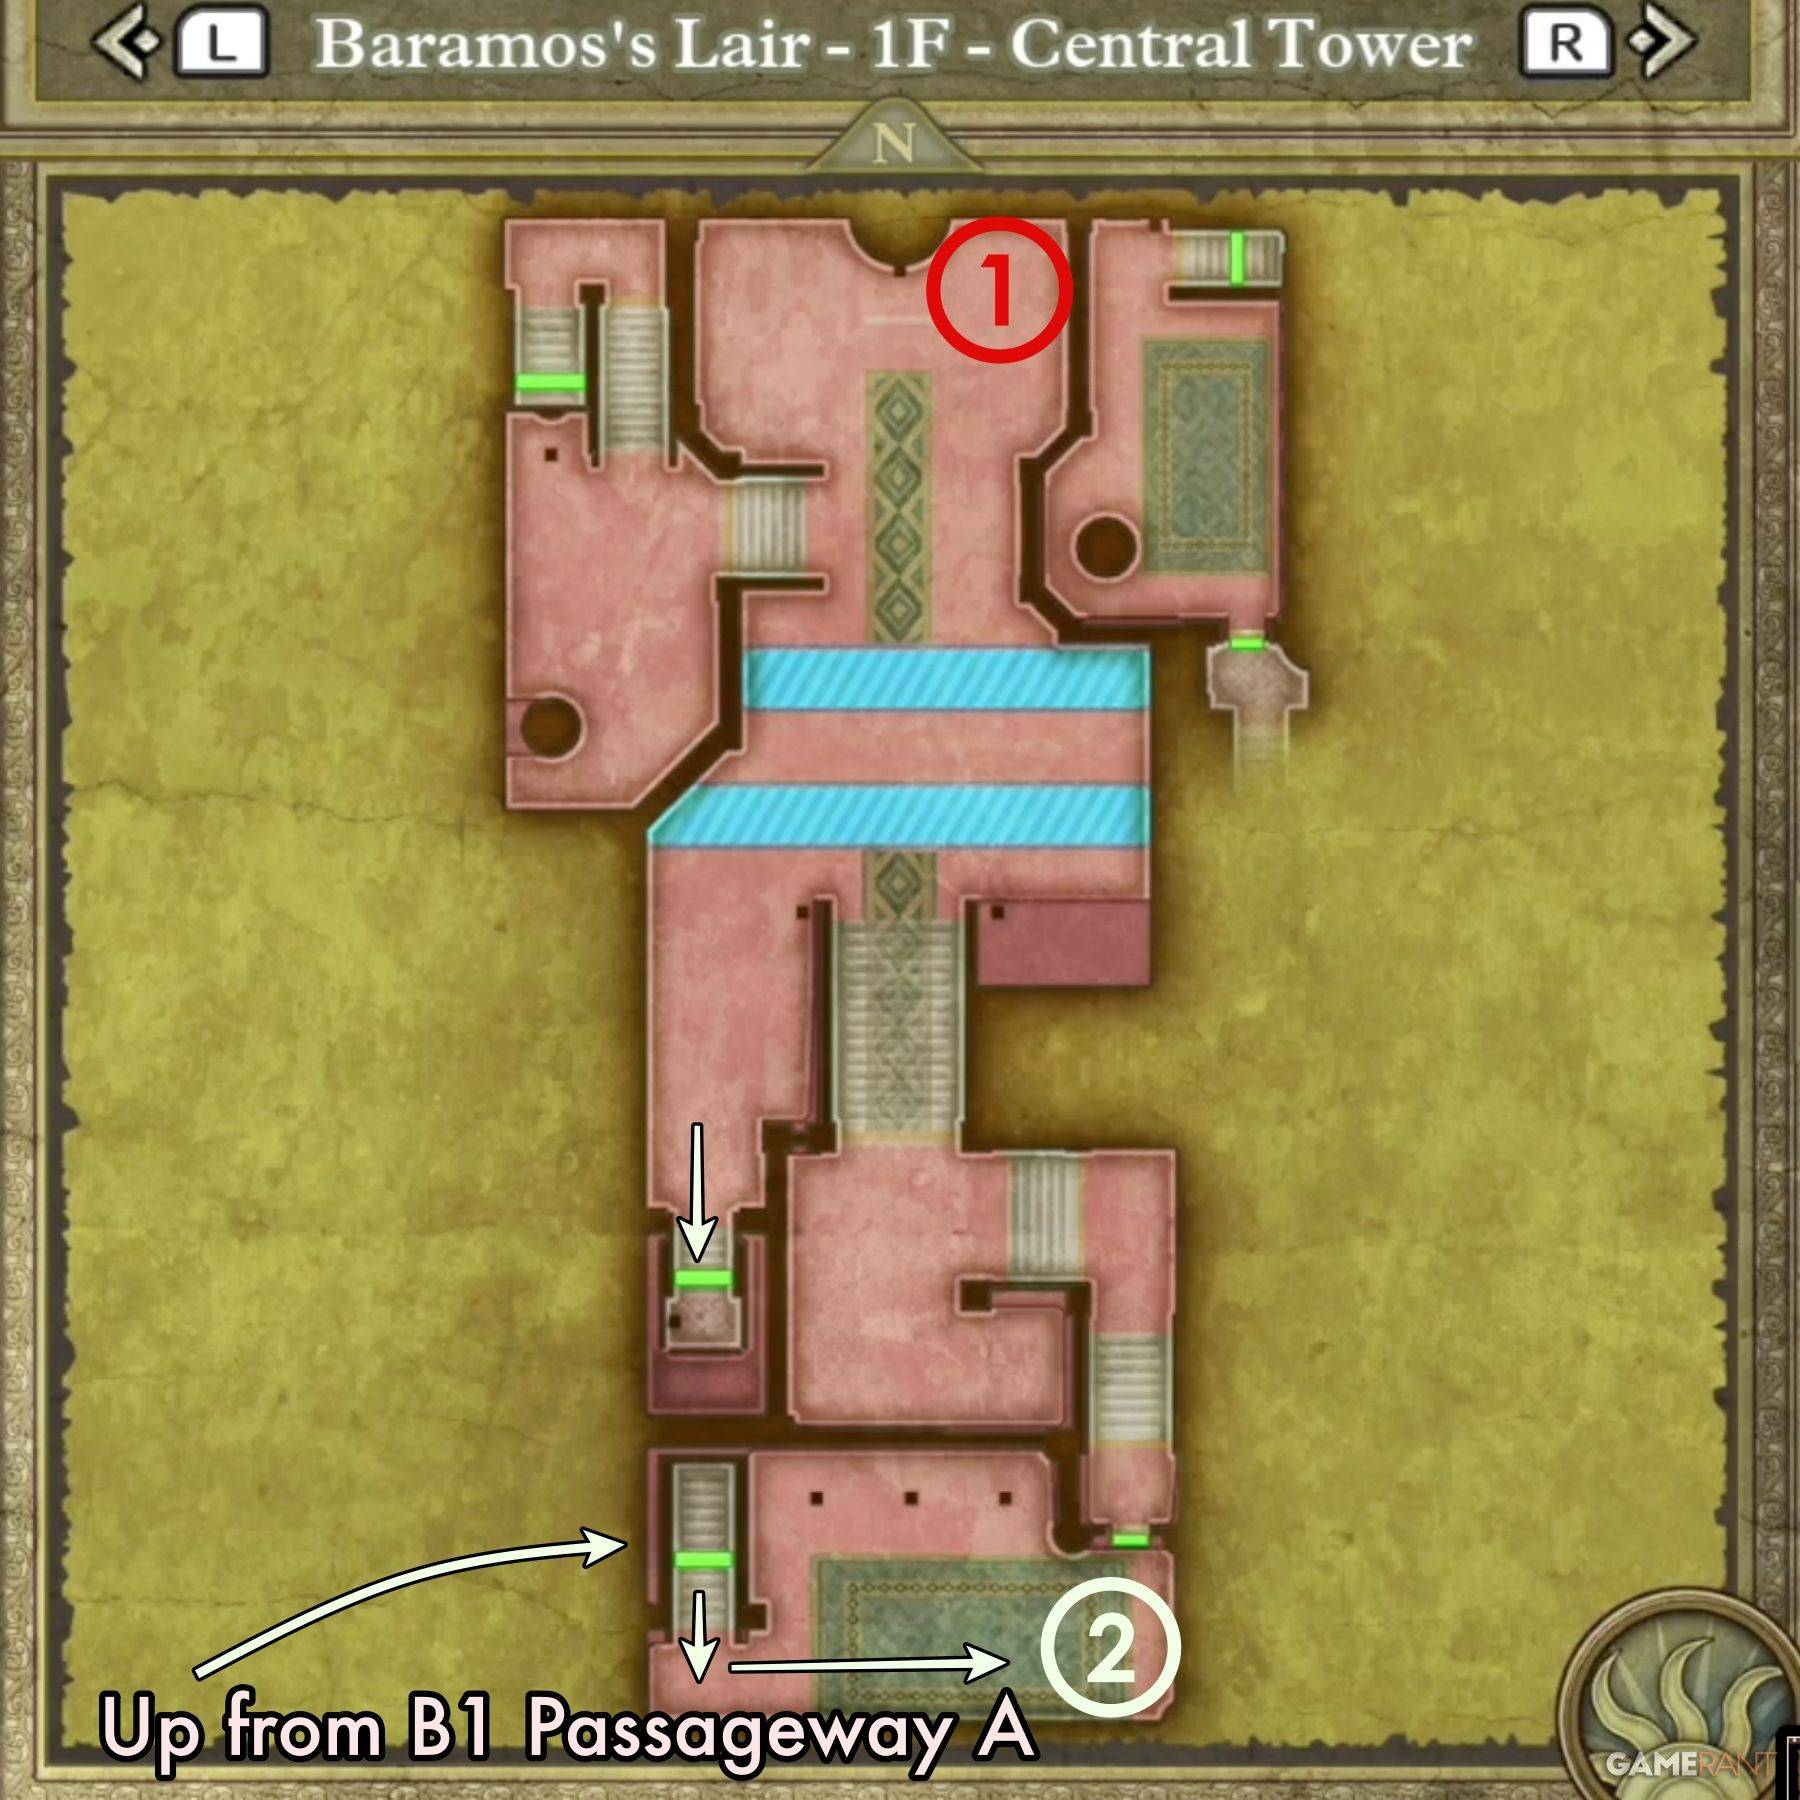
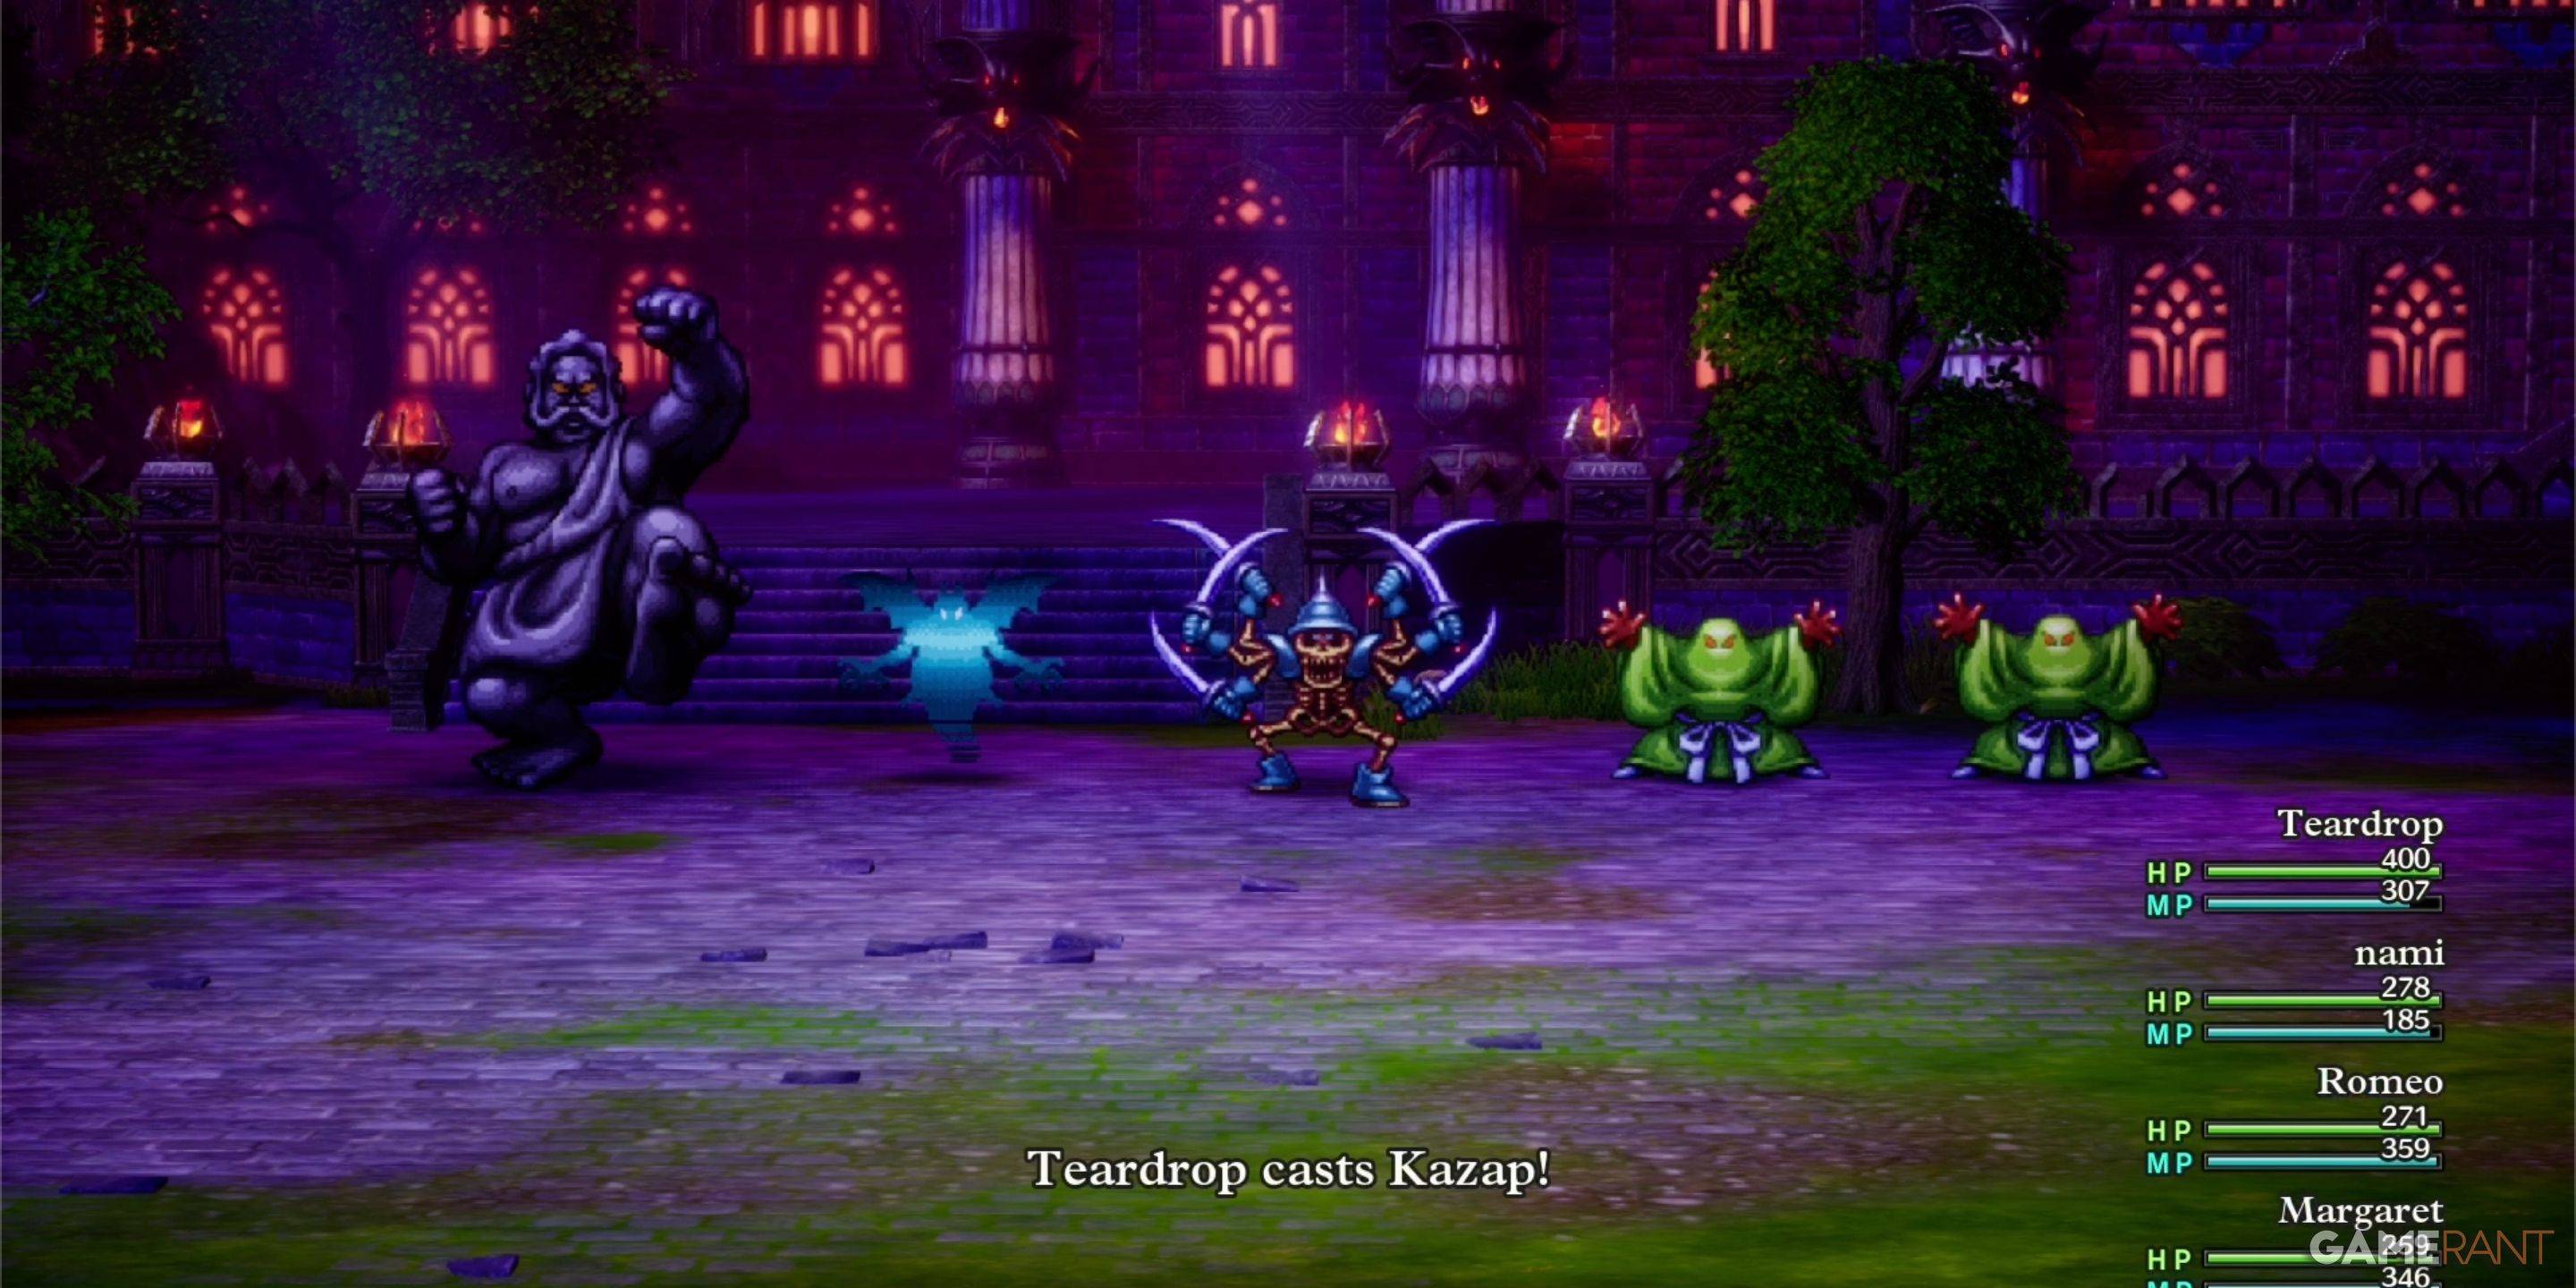
Baramos's Lair deviates from typical dungeon structures. Instead of linear progression, you'll traverse indoor and outdoor areas to reach Baramos. The main outdoor area, "Surroundings," serves as a central hub. The following outlines the main path to the boss fight:
Main Path to Baramos:
Surroundings:
Central Tower:
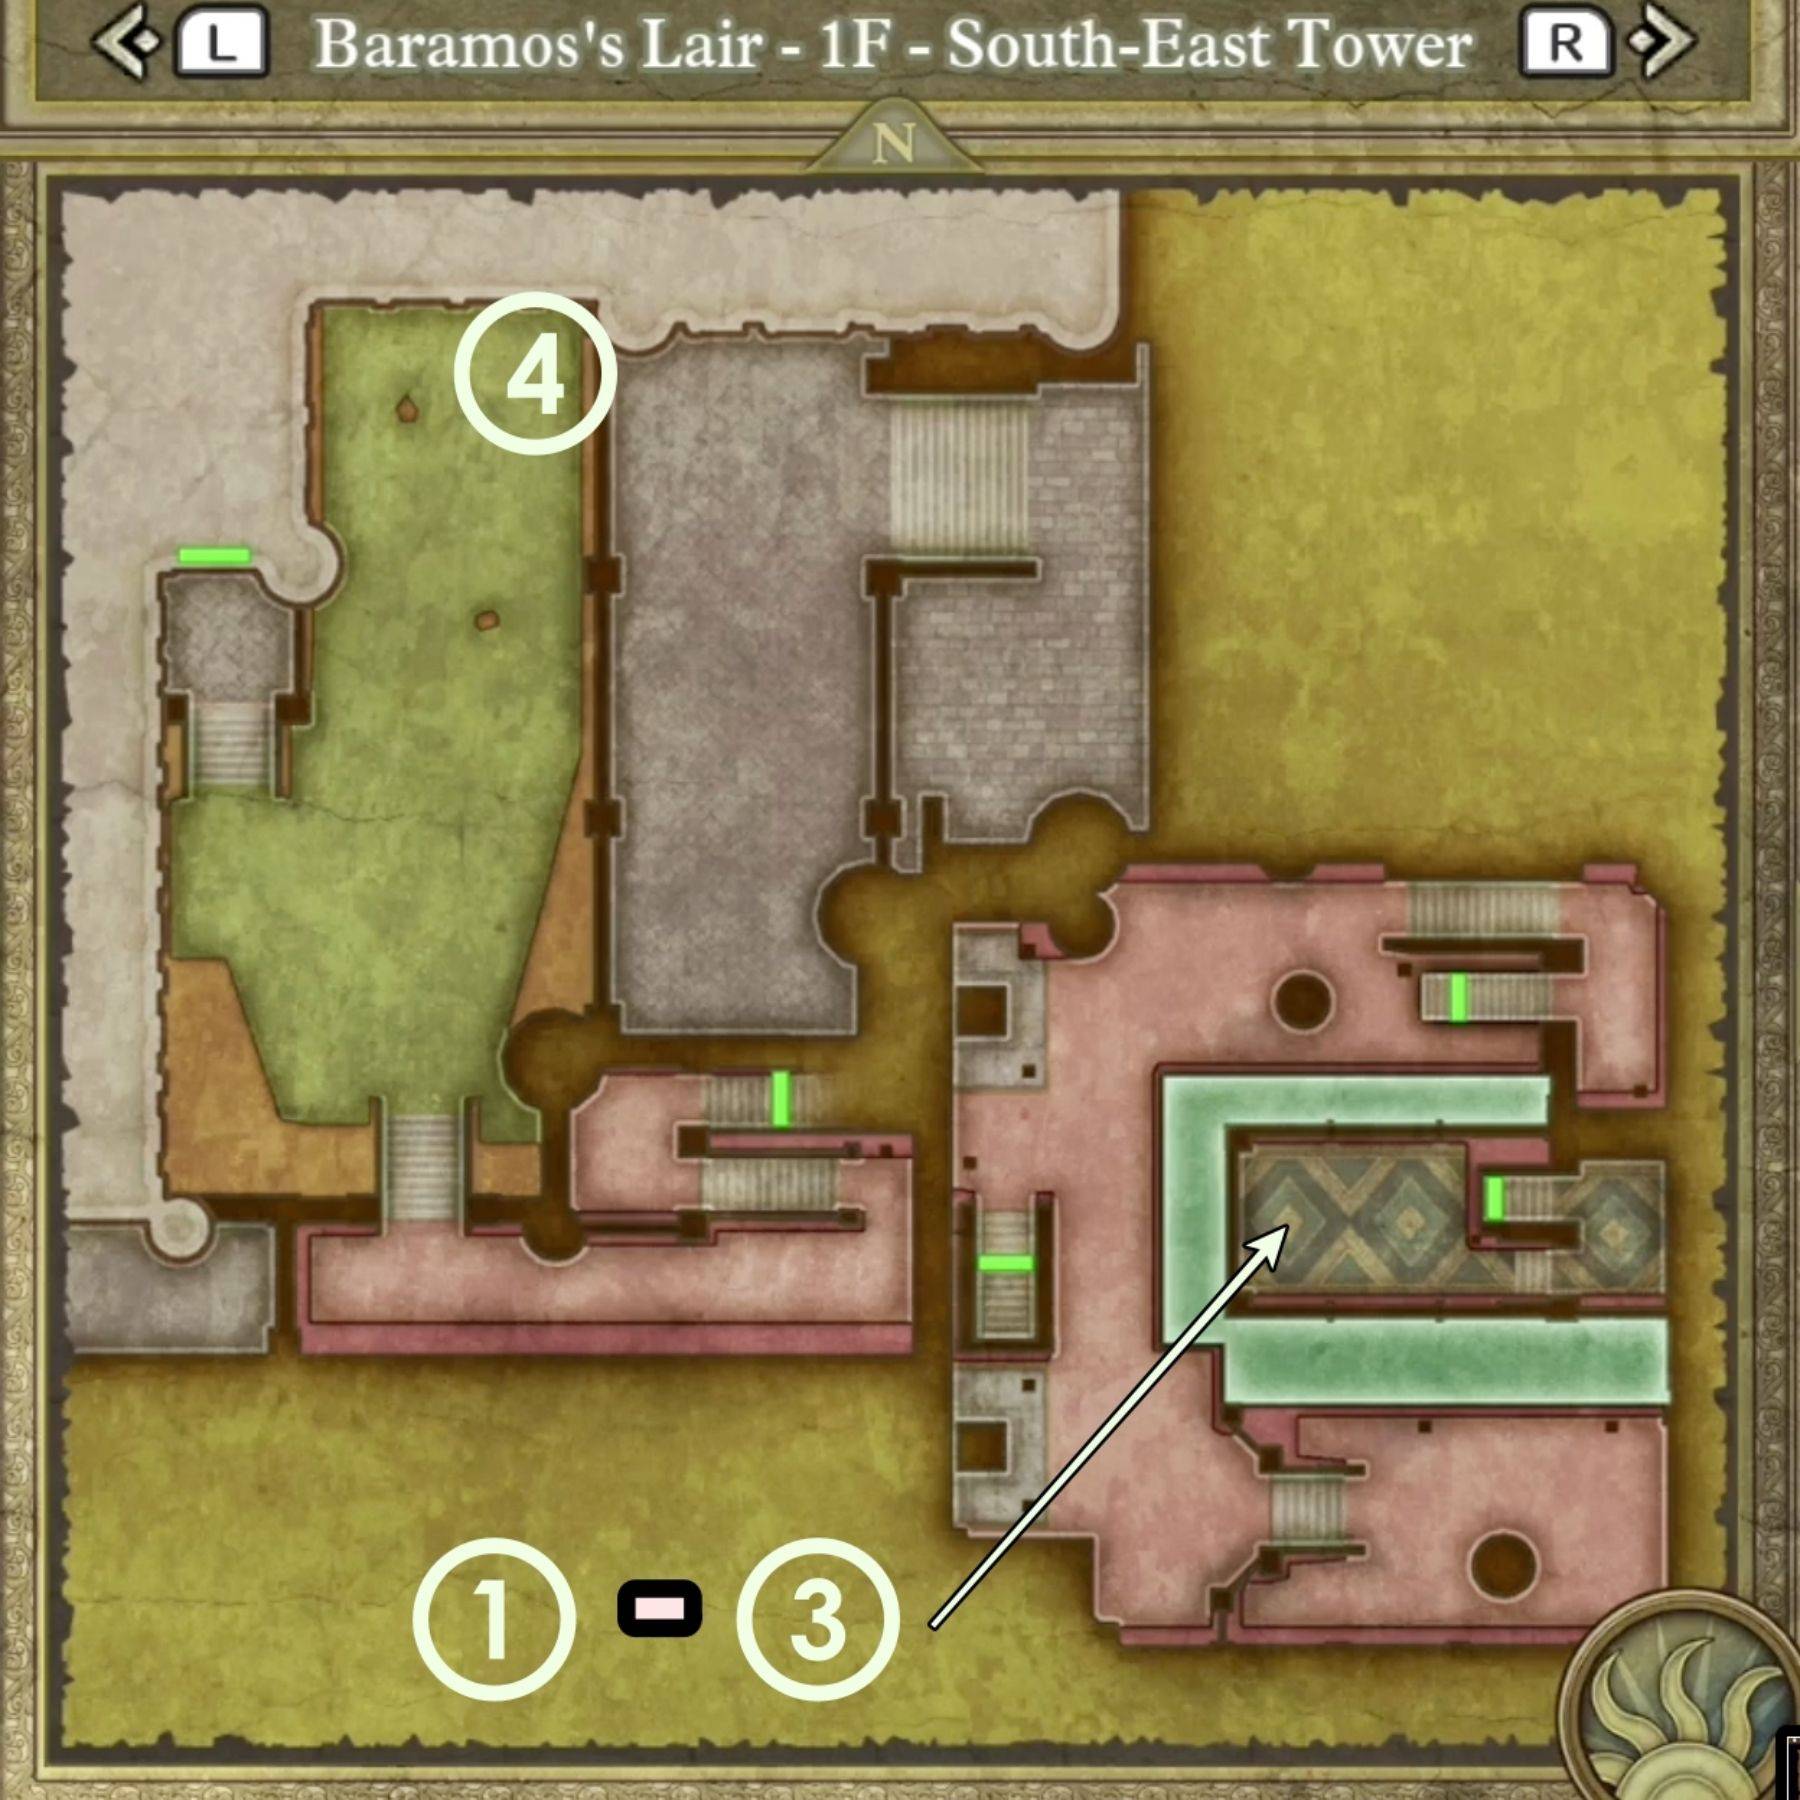
South-East Tower:
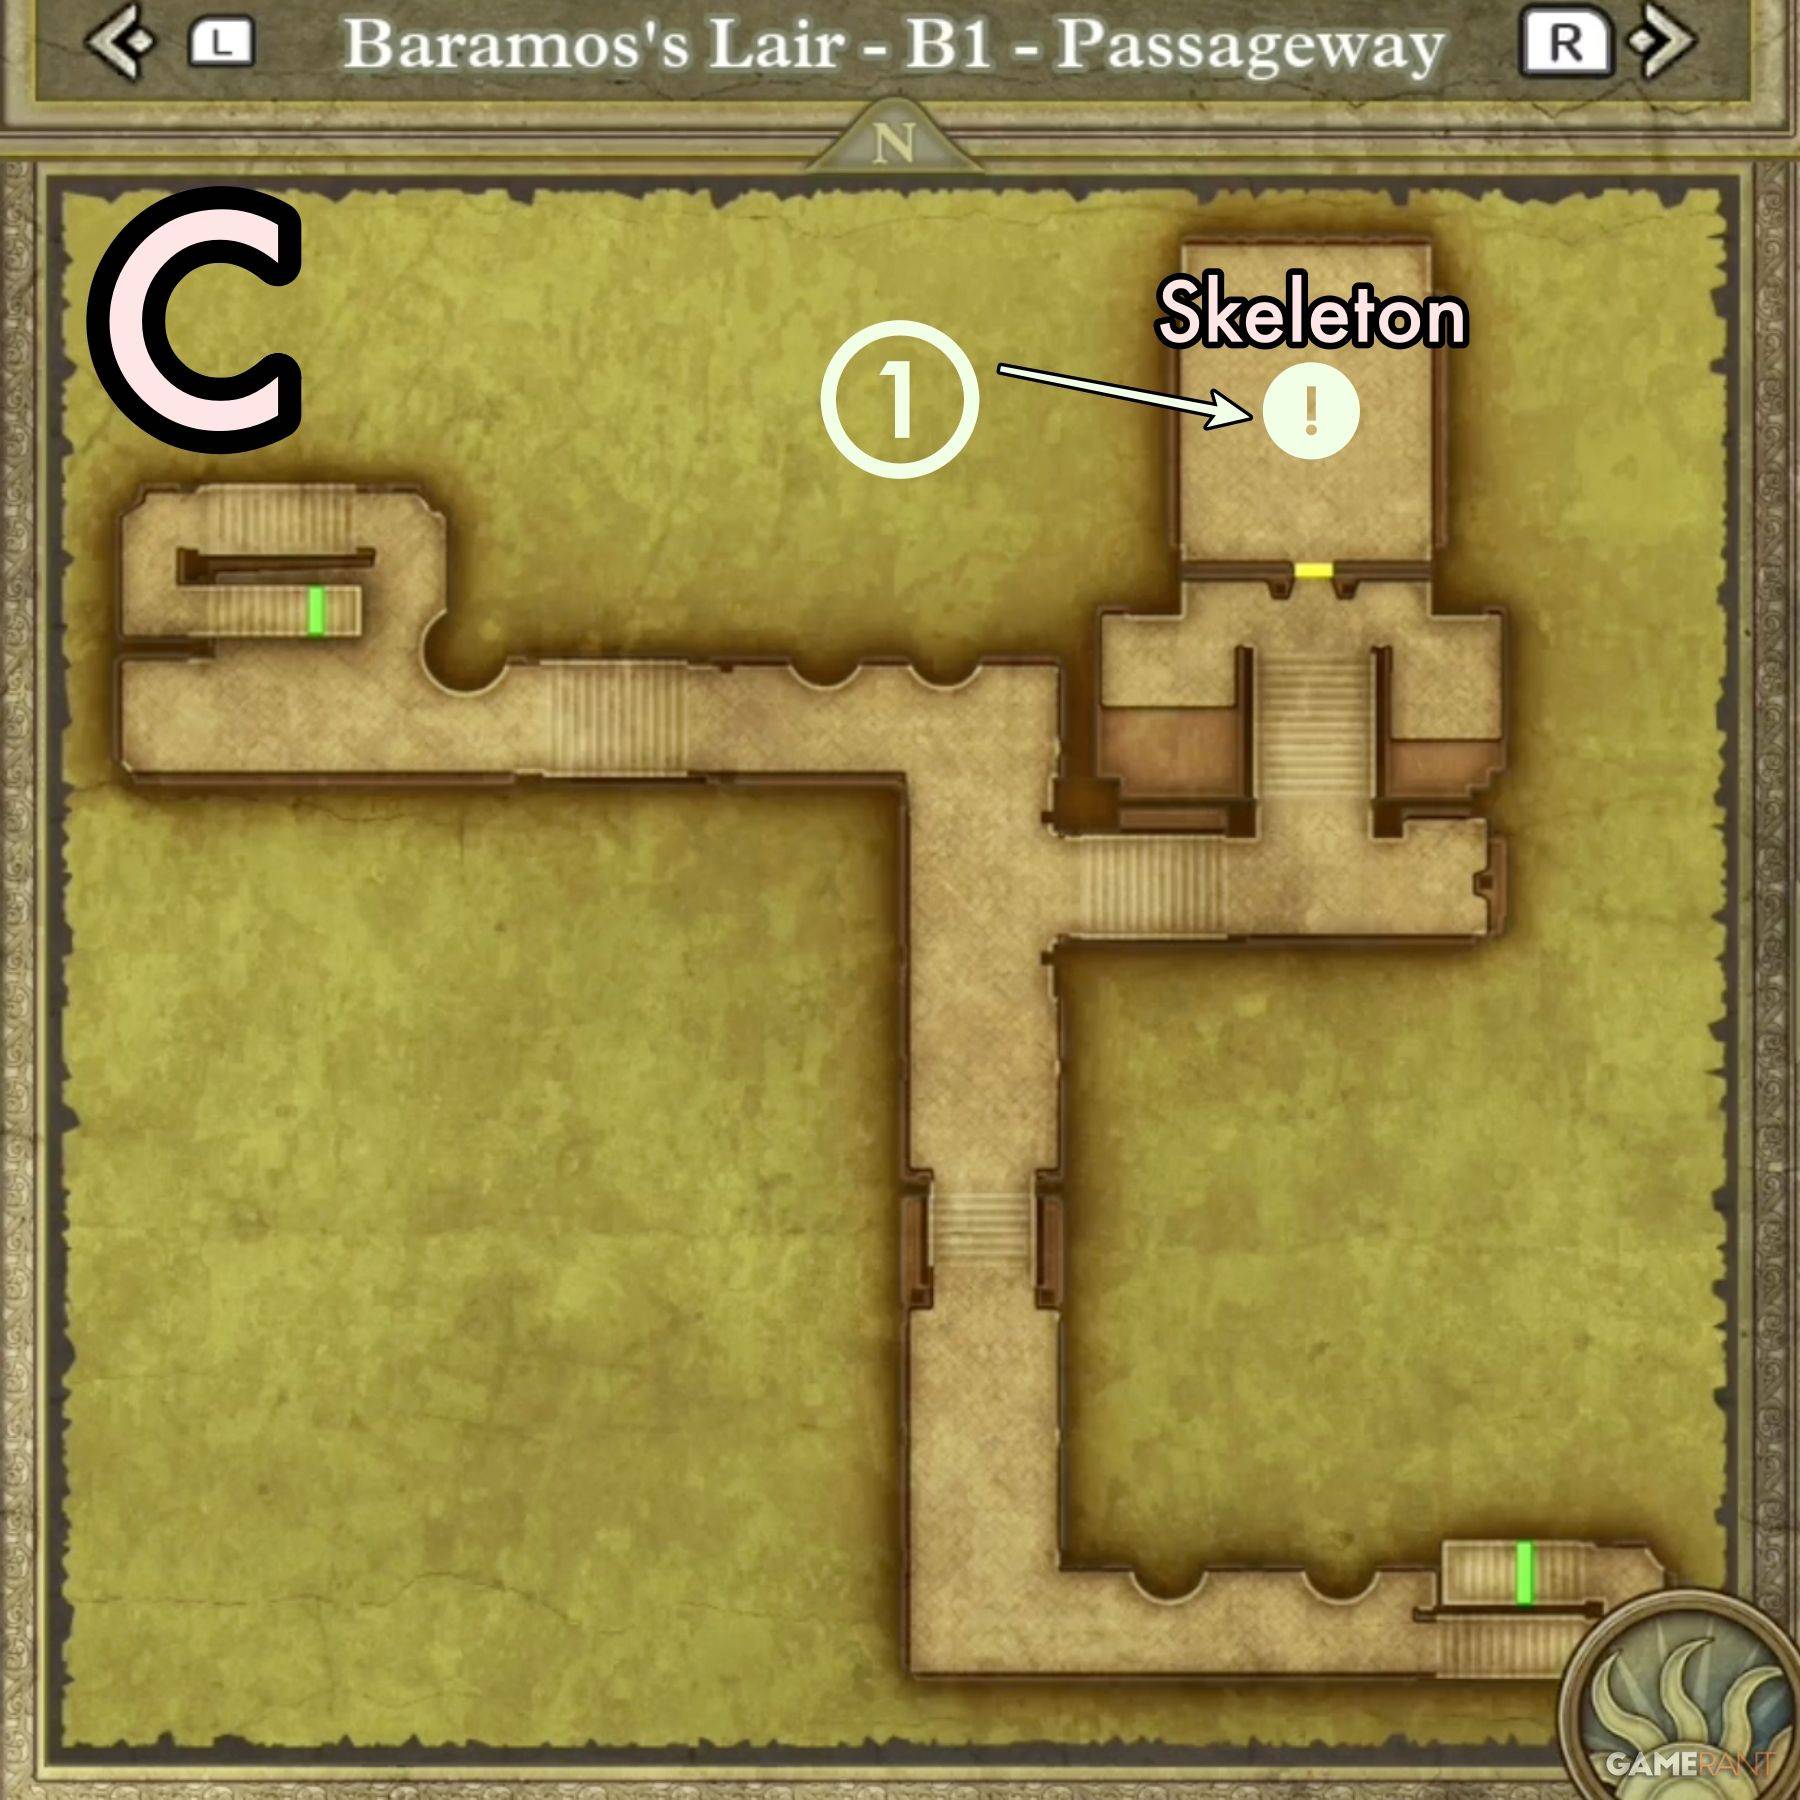
B1 Passageway:
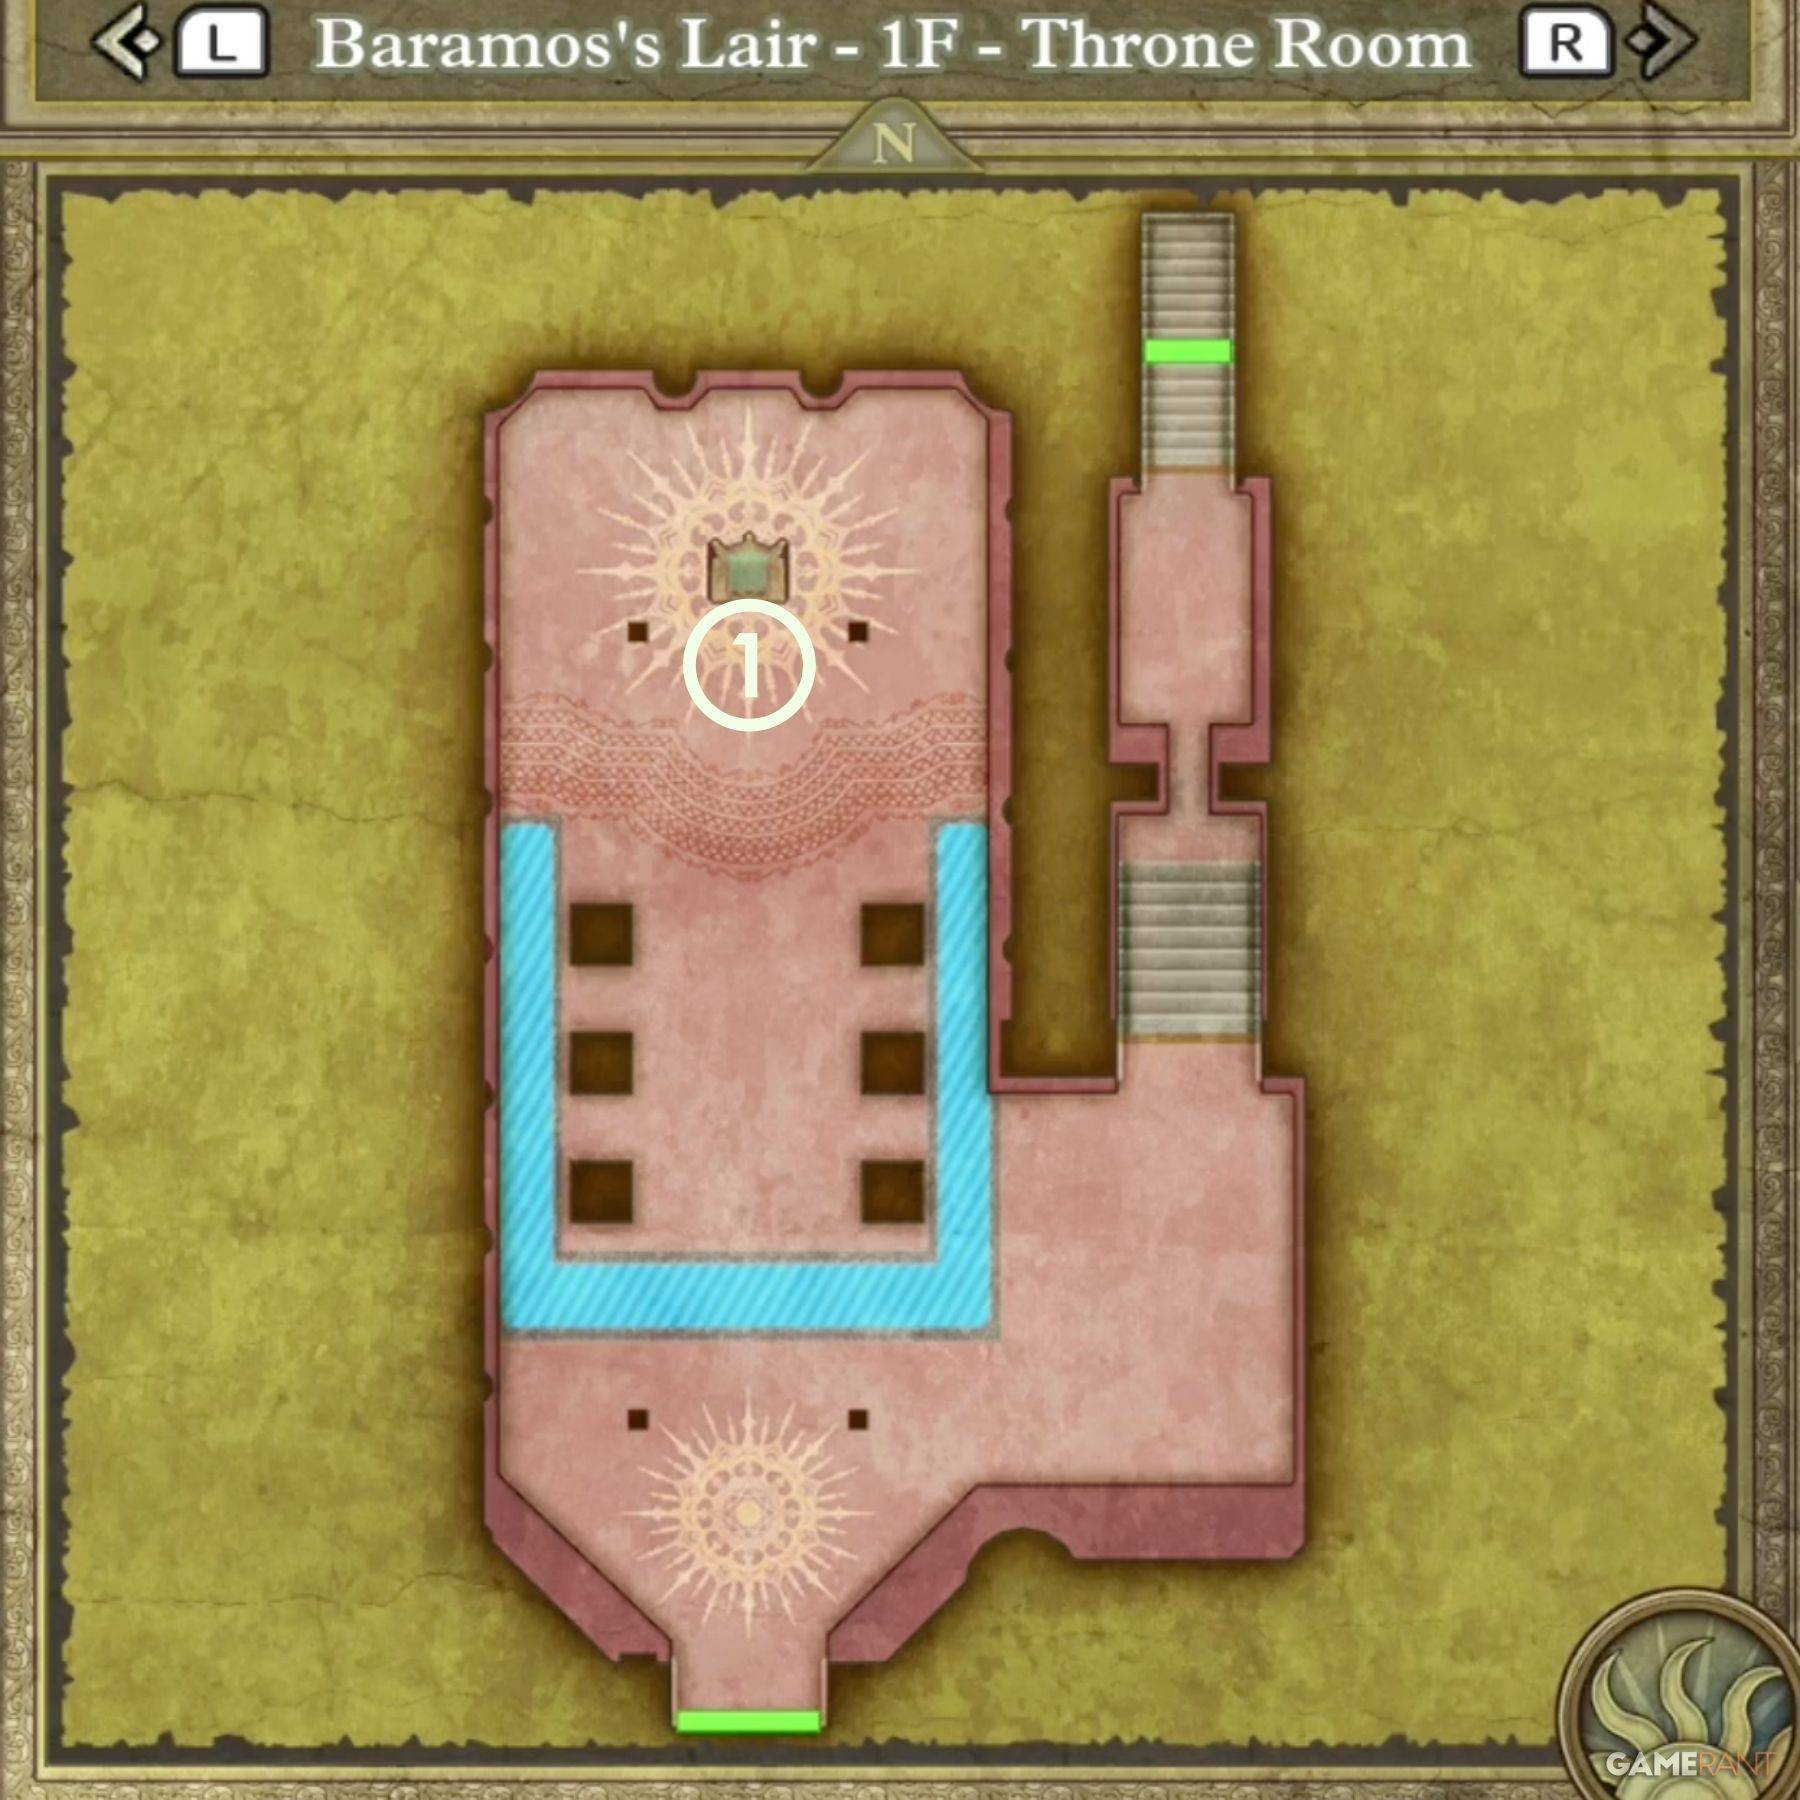
Throne Room:
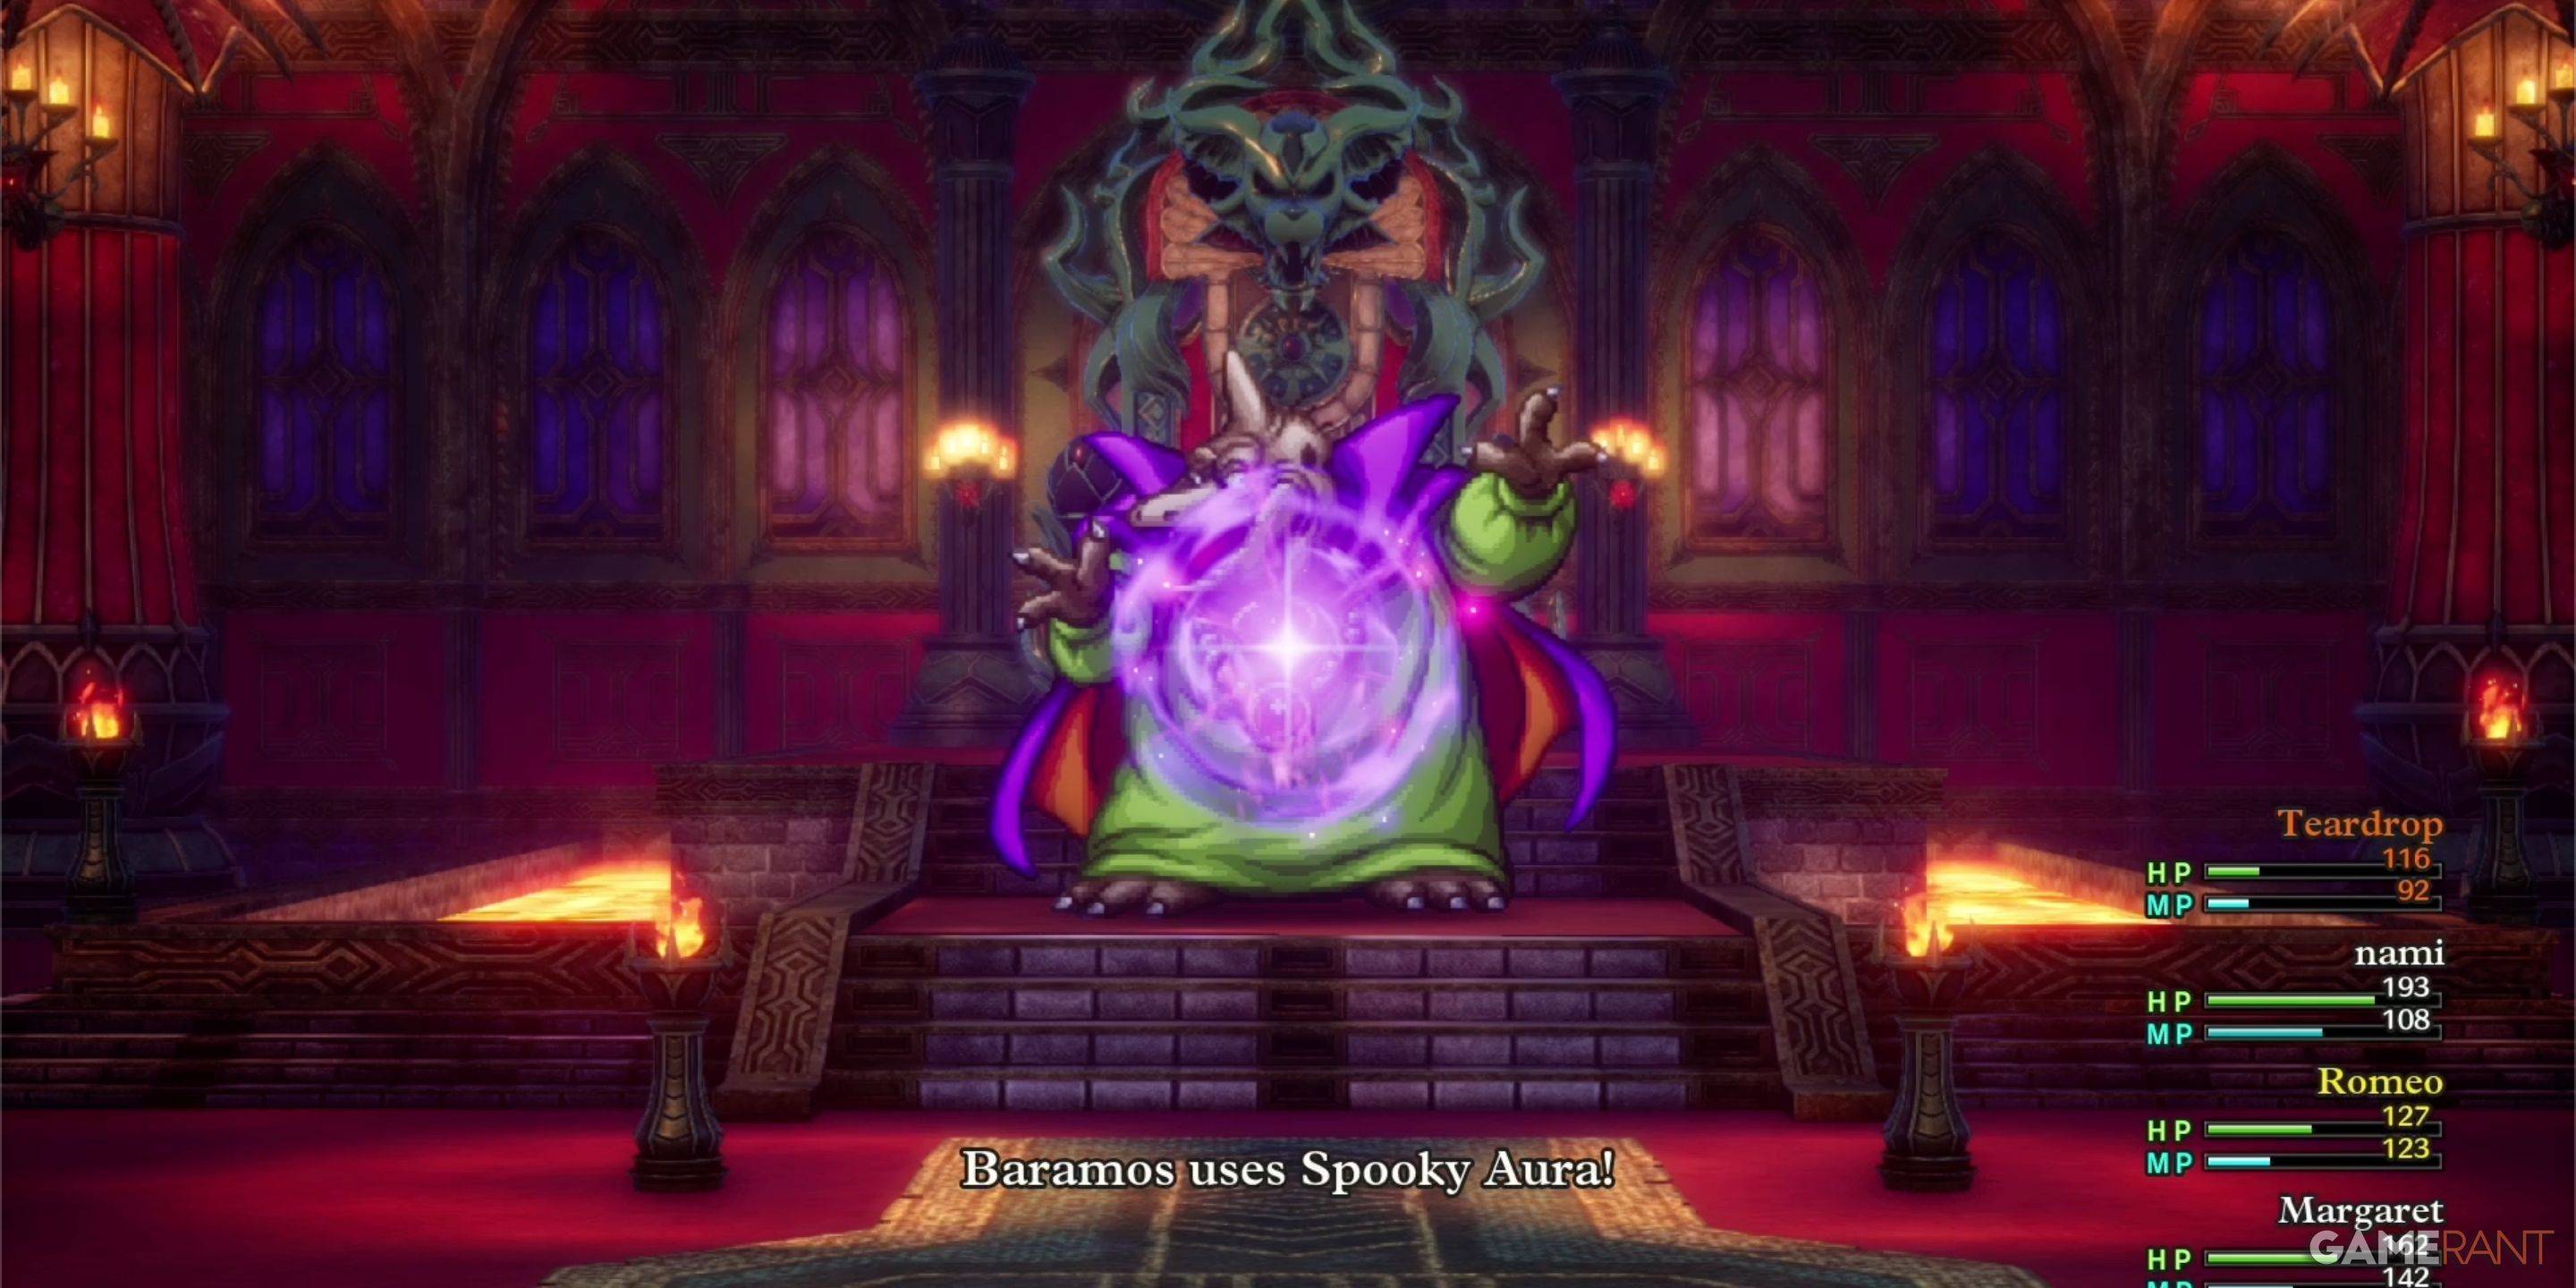
Baramos presents a significant challenge. Strategic planning and adequate leveling are crucial.
Baramos's Weaknesses:
(Note: Baramos is not weak to Zap.) Utilize high-level spells like Kacrack and Swoosh, or Gust Slash. Maintain a dedicated healer to ensure party survival.
| Monster Name | Weakness |
|---|---|
| Armful | Zap |
| Boreal Serpent | TBD |
| Infanticore | TBD |
| Leger-De-Man | TBD |
| Living Statue | None |
| Liquid Metal Slime | None |
| Silhouette | Varies |
This comprehensive guide equips you to navigate and conquer Baramos's Lair, securing its treasures and overcoming its challenges. Remember to adjust your strategy based on your party composition and levels.
Pokemon TCG Pocket: Paralyzed, Explained (& All Cards with ‘Paralyze’ Ability)
Mobile Legends: January 2025 Redeem Codes Released
Android Action-Defense
GWENT: Top 5 Decks for 2025 - Strategies Revealed
Brutal Hack And Slash Platformer Blasphemous Is Coming To Mobile, Pre-Registration Now Live
Pokémon TCG Pocket Is Dropping a Trade Feature and Space-Time Smackdown Expansion Soon
Mythical Island Debuts in Pokemon TCG, Time Revealed
Marvel Rivals Showcases New Midtown Map
Chadwick Boseman to Receive Hollywood Walk of Fame Star This Month
Apr 06,2026
'Whip-Cracking Indiana Jones DLC The Order of the Giants Dated
Apr 06,2026
Amazon MMO New World Has Just a Year to Live, Rust Dev Offers to Buy It
Apr 06,2026
Songs of Conquest Mobile Release: Tactical Fantasy Gaming on the Go
Apr 02,2026
Turkey Ends Roblox Ban, Restores Access
Mar 31,2026
 Category